The Vodia Networks Multi-Tenant (MT) edition now supports the creation of X.509 certificates using the ACME protocol, which can be facilitated through HTTP and DNS challenges. This feature allows administrators to establish a Fully Qualified Domain Name (FQDN) on the PBX, enhancing security with HTTPS. To create a domain, users log in to their Vodia Cloud PBX, navigate to the domain section and set up an A record in their DNS provider (like GoDaddy). Once the domain is established, the PBX can automatically manage certificates, including renewal and deletion, ensuring secure management access.
The Vodia MT edition can now create 509X certificates using the ACME protocol through HTTP and DNS challenges. This is helpful for administrators who want to create an FQDN on the PBX. The Vodia MT edition can also use dnsmadeeasy API requests. In this blog, we will discuss how to manually create an A record for your domain and creating the domain on the Vodia Multi-tenant PBX.
Prerequisite
Port 80
PBX must be on a Public IP
DNS Made Easy Optional
DNS Provider Ex (Godaddy)
Creating the Domain
Log in to your Vodia Cloud PBX and navigate to the list section. Press Create to create your domain name. We are calling our domain voice.pbxnvoip.com
Secure https
In administrator, mode navigate to network --> ports
Activate (Redirect to https)
Creating an A record
We are using Godaddy for this example, as we thought it would be easy to follow.
Log in to your account
Choose your DNS name and navigate to (DNS), which should bring you to DNS management
Click on Add and Choose (Type A record)
The host is the name of the new domain you created
(Points to) is the IP of the Vodia Cloud PBX
TTL can be set 1hr or 1/2hr
Save
Navigate to your domain name, e.g., voice.pbxnvoip.com
Note: The main limit is Certificates per Registered Domain (50 per week). A registered domain is, generally speaking, the part of the domain you purchased from your domain name registrar. For instance:
in the name www.example.com,the registered domain is example.com
In new.blog.example.co.uk,the registered domain is example.co.uk
The PBX now supports generating X.509 certificates using the ACME protocol through HTTP and DNS challenges. When using the HTTP challenge, the system must be on a public IP address and it must use port 80. When using the DNS challenge, the DNS must have access to the DNS provider (currently DNSMadeEasy is supported).
When adding a domain, the PBX will attempt to create the DNS entry for the new domain and issue a certificate for the domain. A few days before the certificate expires, the PBX will then attempt to reissue the certificate. When a domain gets deleted, the PBX will attempt to delete the DNS entry.
It is now also possible to define a DNS name for the system. The PBX will also attempt to generate a certificate for this DNS address so management has access to the system through a properly-encrypted HTTPS connection.
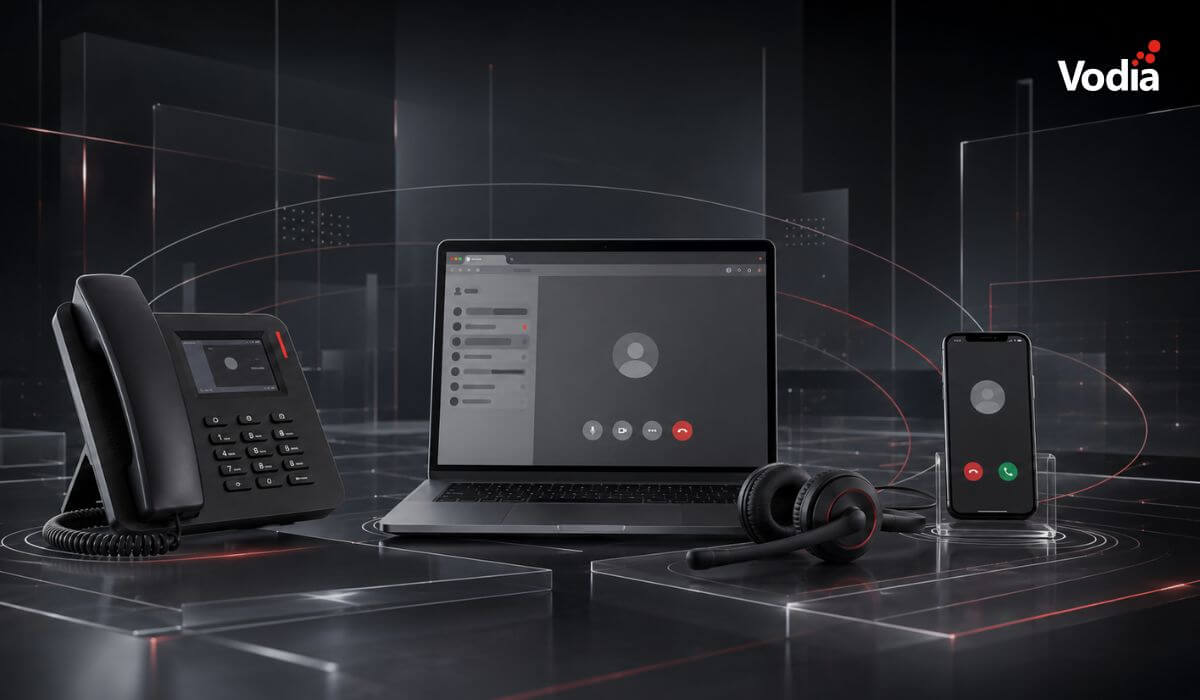
Business communication is no longer tied to a single device. Desk phones remain valuable for employees who manage high call volumes, mobile apps give remote and travelling teams access to business calling wherever they work, and browser calling fits naturally into computer-based workflows. This article looks at the strengths and limitations of each endpoint, explains which roles they suit best and shows why most organizations benefit from building the right mix rather than selecting one option for everyone.
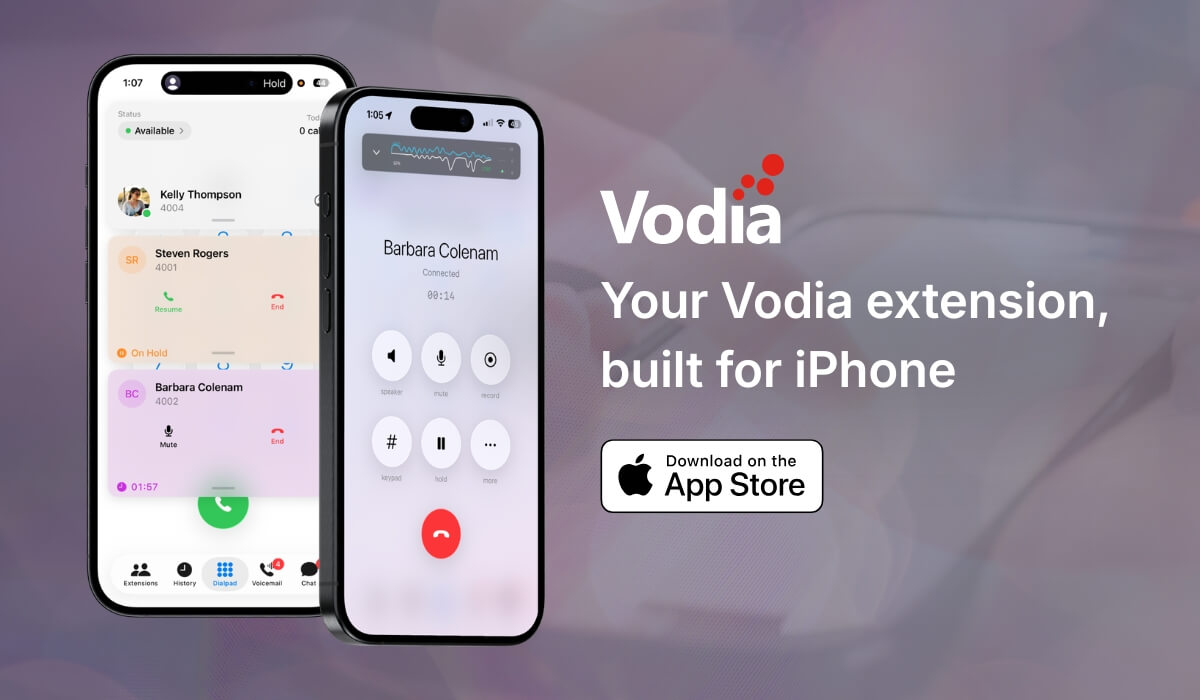
The new Vodia iOS app gives users a native way to use their Vodia PBX extension from iPhone and iPad. Built around a cleaner, card-based interface, the app makes it easier to manage calls, voicemail, chat, extensions, call history, and active call controls in one place. Users can place and receive calls, park or transfer calls, check voicemail, and view extension status from the app. It also adds readiness checks, visual audio feedback, call quality visibility, and adaptive recovery when network conditions change, helping teams stay connected with a reliable mobile PBX experience.
Cloud communications can create a valuable recurring revenue opportunity for MSPs, but only when they remain in control of the customer relationship. By managing branding, pricing, service delivery, and support, MSPs can build stronger customer loyalty, protect long-term account value, and expand their offering as customer needs evolve. A white-label approach also gives them the flexibility to package voice, AI, integrations, and managed services under their own brand.
.svg)